Hello Friends~
Welcome to my newly cleaned & redecorated bedroom! I am very excited to share my progress with you all. You see- I am a bit of a clutter bug; and I have had definite housekeeping issues in the past. My problem is not one of leaving 'trash' & 'junk' laying around... it is one of having too much stuff.
*
I know that this has become a very common problem for many of us in our 'have it now', disposable society. I even heard a really cool term for it- 'Affluenza'. And unfortunately 'affluenza' doesn't only strike the rich, or the folks who are 'trying to keep up with the Jones'.
No- 'affluenza' can affect any of us- even those of us who may not have alot of money.
*
Over the years I have made, bought, been gifted and collected waaaay, way too much stuff; and the problem is, that while I love almost all of it- I just don't have the room for it all. Between the normal household 'things', my children's 'things', and my many interests and hobbies- I have accumulated enough 'stuff' to fill my small house to the gills.
*
Also, a big part of my 'clutter problem', is that as a very visual person, I constantly feel the need to keep my stuff 'out' so that I can see it- otherwise, I forget it is there- and I do not use it. (Think books, art supplies, make up, jewelry, cooking stuff, kids toys, clothing & accesories, etc.)
This isn't merely a problem of too much stuff for such a small house- No!- I have a feeling that I could fill ANY size house, if given enough time.
*
And it is not only a matter of buying more organizational equipment. Trust me- as I cleaned my house; I cleared plenty of drawers, cabinets, closets, boxes and cubbys- if I owned it- I filled it!
To make it worse- I have an obbsesion with collecting cool jars, boxes, tins and such; in which to store all of my 'stuff'!
*
And while my things were fairly well grouped together, and most had 'homes'; ... I began to feel that I, myself was not very 'together', and that I was running out of 'home'. I began to realize that my outer clutter only was a manifestation of my 'inner' clutter. This is definitely not healthy for me; and is not the legacy I want to leave to my kids.
*
Somewhere between getting married, having a baby, moving houses, (having another baby), a failing marriage and subsequent separation, the depression that often goes along with such life events, raising school age children- and everything else that goes on...I had lost my will to fight against the beast of disorganization.
*
I told myself that playing with the children was more important than sorting out our ever growing accumulation of 'stuff'. I used all the excuses- house too small, no money for nicer things, a single Mom with young children, a long family history of clutter bugs and hoarders, etc., etc...
*
I chalked it up to being an eclectic, artistic type person. Pretty soon it was easier to ignore the mess; than it was to attempt to fix up a house full of junky hand me down furniture, and outdated belongings.
*
So- earlier this Spring- I set about a giant house purging & a mission to create the home that I had envisioned for myself and my children. (Not that I haven't done this before- I have, plenty of times.) But I never really had gathered enough steam to overhaul my entire home- as well as my attitude about my home.
*
In these last few months, I have made some amazing progress- both inside my home, and out- as well as within my own head. I still have plenty more work to do; and a ton of 'fixing up' and home decor projects that I still want to tackle.
*
But so far, I have:*
~Cleared, organized and reclaimed my Bedroom from the storage room with a bed that it had become- and created a room that I enjoy being in, as well as one that reflects my personality & interests.*
~Cleaned & made presentable my Living Room; which is a work in progress, as I still would like to paint, and aquire new couches. But...it is now decent, and inviting; and best of all, unexpected visitors can show up without striking dread & terror in my psyche.
*~Cleaned, organized & started the redecorating process in my daughter's room. It is now a place that she can play, study & rest in- and a room that she is proud to bring her friends into.
*~Gave up my bedroom, so that my son could FINALLY have his own room. ...and created an awesome space for my Little Guy!
*~Cleared, cleaned, organized & reclaimed my Art Studio. This is a major feat in itself! And last, but certainly not least... *
~I whipped my front & back yards, gardens, & my back patio back into shape. In fact- I daresay that they are in better shape than they have ever been in the past! (Ditto for the inside of my home!)
*
I still have a long way to go. I have made a great start- but in truth, I have merely scratched the surface. I know that I need to keep up the work; and that the 'stuff' never stops rolling in. I need to be vigilant about keeping on top of things. And to remember that my desire for a comfortorable, inviting home is stronger than my need for 'things'.
*
I'd still like to paint, and of course finish hanging my pictures, art, and shelves.... but now that I am on a roll- these goals seem more attainable than before. I hope to share with you my continued progress.
*
(And while I know my little house is very humble, and I don't have a lot of 'nice things'... I have always had a way of making it nice with what I do have. I hope that you can see beyond the fact that I don't have beautiful furnishings & whatnot- and still see the steps that I have made.)
*
So... without further ado...
*
Welcome to my newly cleaned & redecorated Bedroom!~A Crafty Chick Freestyle Makeover! Here is the veiw when you come into the room. My bed and new sheet set I bought for my birthday back in December.
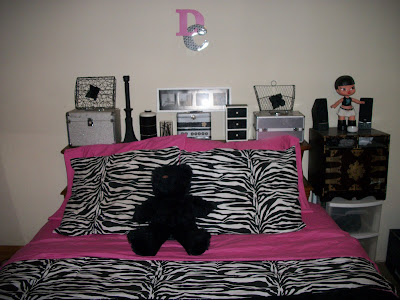 One bonus about being single is that I can finally surround myself with all of my 'girly' type things (without having to worry about if my husband likes it or not!)
*
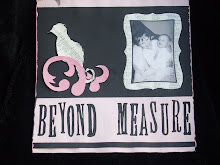
On my headboard sits some of my little altered tin boxes & drawer sets that I have created; along with photos of me and my children.
*
Eventually, I plan to paint a wall mural. Either the black silloette of a cherry blossom tree with a bird in it; or a black swirly type faux wrought iron bed frame. Or, I may do both- the bed frame on this wall, and the tree on the opposite wall. We'll see. For now I have my initials on the wall above my bed. To the right of my bed is my cool shelf/mirror thing. (And yes- it actually belongs hanging on the wall above a big bed; but I scored it for free, and have hopes of painting it black & white, and possibly decopauging some neat paper onto the back panel.)
 In the meantime, its shelves have been home to many neat displays of my collections, as well as a great bedroom altar. I usually change it each month- or season, depending on my mood. Currently it is housing my candles, family photos and my art. The 3 peices in the middle of the top shelf are one of my Witchy Art Dolls, my 'Queen of the Craft' Collage, and a black & white Birdhouse I made. The second row holds my Altered Journal, an Altered Heart Box & to the right is a Flower Canvas- all made by me.
*
I forgot to set them out when I took this photo- but I have added several of my nicest peices of clear & rose quartz crystals to the display. It looks especially nice at night, when the room is lit by tons of candles.
*
On the top of my dresser sits my little black velvet dressmaker dummy, flowers, photos and a couple of tins to put my odds & ends.
  And also a wire square that I repurposed into a jewelry holder.
  I use these all over the house. They are great little 'bulletin boards' to hang doodads from.
I use them in the kids room for all those little things they bring home & love- but that I don't wan't cluttering up their shelves. In my Art Studio, to hang my supplies, and as inspiration boards to clip my idea photos & swatches to. In the bathroom for jewelry and hair accesories. As well as in the kitchen, as a wall rack to hang utensils from. (They can even be suspended from the ceiling and used to hang pots from.) These little things are great- and the price was right too- f.r.e.e.!
And lastly is my other wall,
 where I have a floor mirror, a T.V., and my daughter's little pink guitar, that I 'confiscated' as a room decoration- but of course I told her that any time she wants to use it she can! LOL I just thought it looked so cute in my black, white & pink bedroom, that I had to use it.
Well Guys, I hope that you enoyed this little peek into my home. I really wish I had taken some before pictures, just so you could see how dramatic the change is... but , because it was so messy & not 'put together'- I never, ever would have thought of taking pictures of my bedroom before- so you will just have to take my word for it....THIS IS A BIG IMPROVEMENT!
I will be taking some more photos of the rest of my rooms to share with you all in future posts. And if you would like to see my progress in the gardens- I have a post on Crafty's Cuppa Coffee that shares my Spring 2010 Garden.
*
In the meantime...
 I have another drawer to clean out! Lol.
*
Have a great day! and Thanks for stopping by!~Danae, aka 'Crafty'

 Hello Friends~
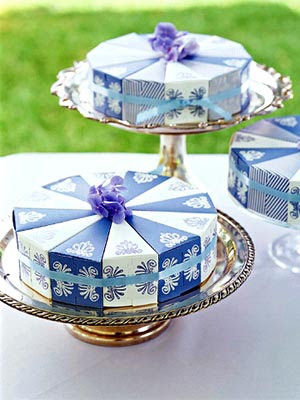 Because you want to thank those who come to wish you well on your wedding day, it's thoughtful to give each of your guests a small token of your appreciation. Friends and family will treasure these simple gifts thought up by the folks at


 This paper heart project includes a remembrance quote and is finished with a tassel and ribbon for hanging.
  Fill confetti cones with rice, confetti, or bird seed to help your guests send you off in style.
 Paper lanterns are fashioned from scrapbook papers. As part of your reception decor, group them close together over a glow of tiny white Christmas lights
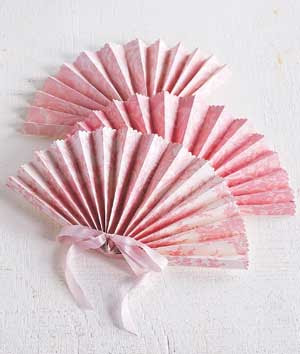
 Make your own table decorations by using crepe paper around cardboard tubing to make paper crackers. Fill with small candies or favors.
 Give your guests a piece of your cherished day in the form of these handmade keepsake containers.
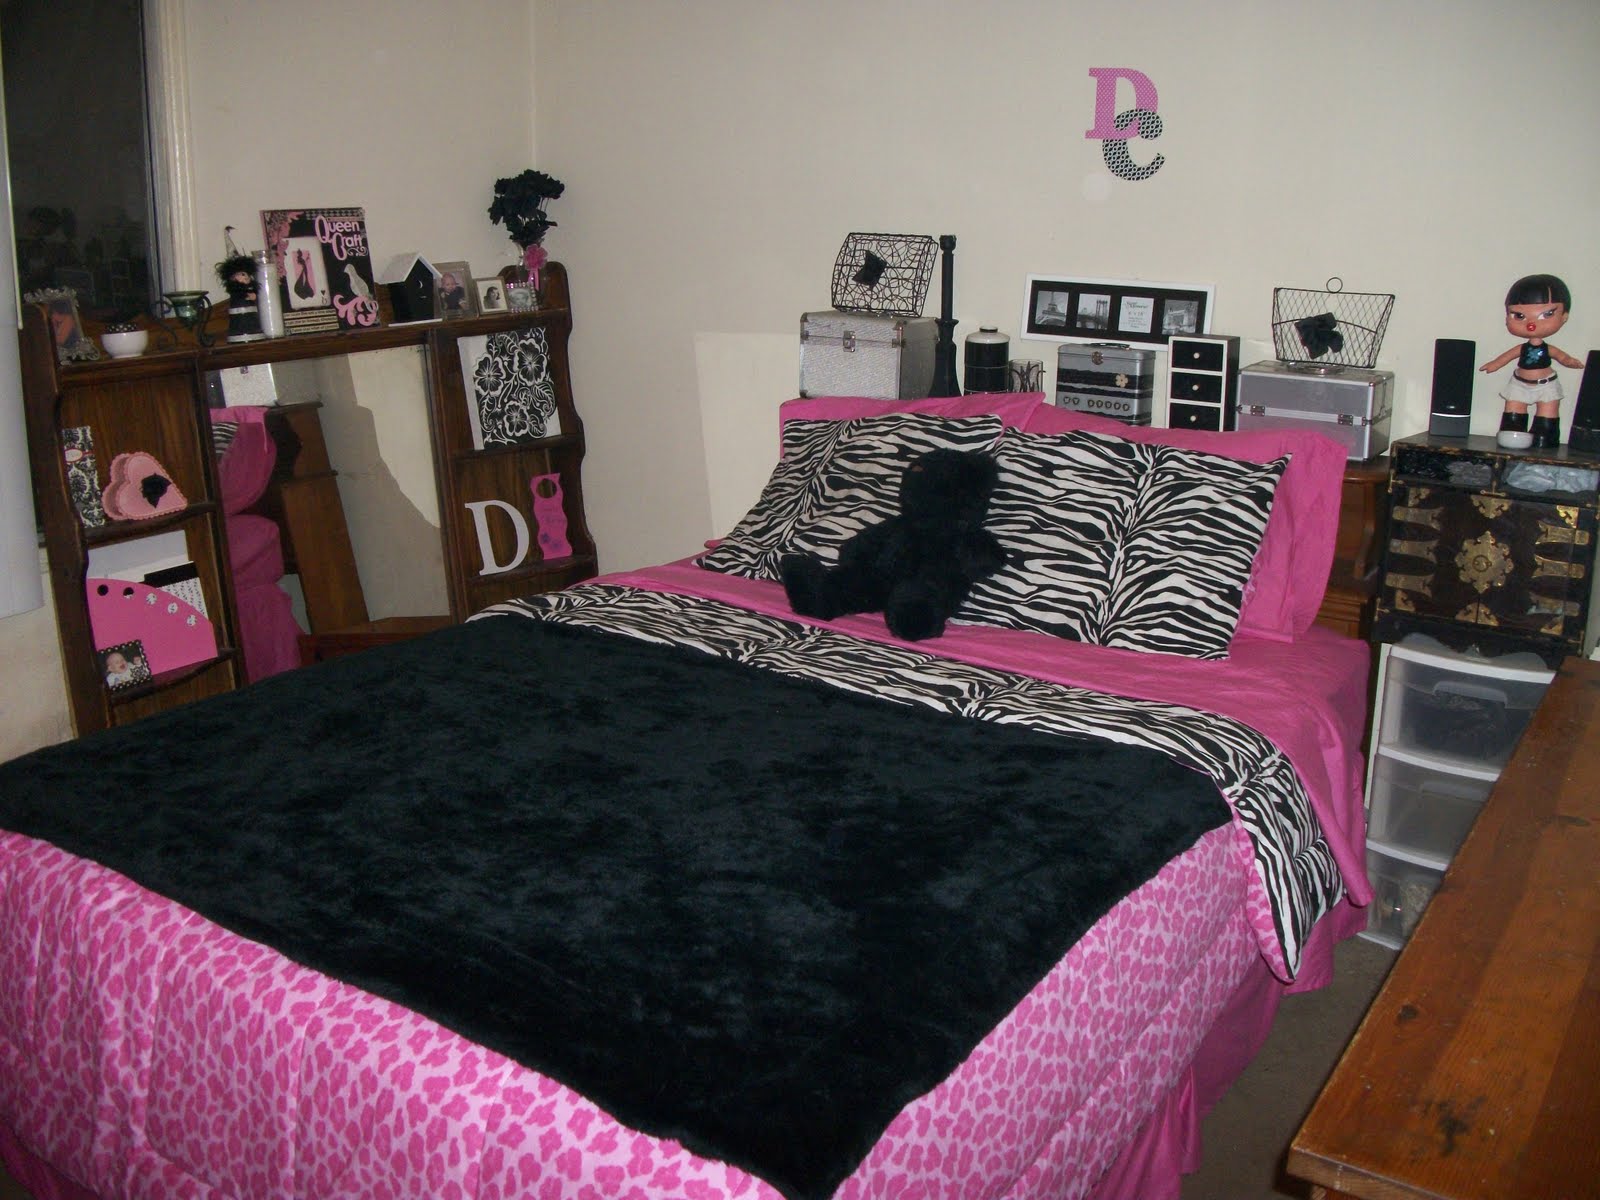


 Hey there to my Loyal & Crafty Blog Readers~
 A vintage pin adorns a ribbon for a pretty curtain tieback. Wrap sheer ribbon around the curtain panel and tie, leaving tails about a foot long. Pin the flower brooch at the knot. Brooches like this one are easy to find.
 Turn a wooden cutlery tray into a beautiful piece of art. Glue scrapbooking papers to the bottom of each compartment using an adhesive that works on paper and wood; secure screw eyes to the cubbies to hold jewelry. Select favorite pieces to fill the tray.
 Decorative pins and belt buckles make fun frames for family photos. Remove the buckle's center catch if needed, and tape a photo to the back. To prop your pieces, fold 1/2-inch-wide strips of cardboard into triangles, and then tape them to the backs.
 These flea market frames, outfitted with fabric or paper, ribbon, and glass knobs, show off a beautiful collection of brooches, bracelets, and necklaces. Even the earrings get a chance to be in the spotlight when hooked over a length of ribbon held in place with upholstery tacks.
 The embroidered designs on these silk pillows were enhanced with stitching on jade disks and small glass beads gleaned from a mixed bag of jewelry bought at a yard sale. Remove the pillow forms before stitching.